Eyeshadow Placement 101
If there’s one lesson I’d like to implement into the minds of everyone out there – it’s that makeup does NOT need to be scary. You just need the right tools! 🎉
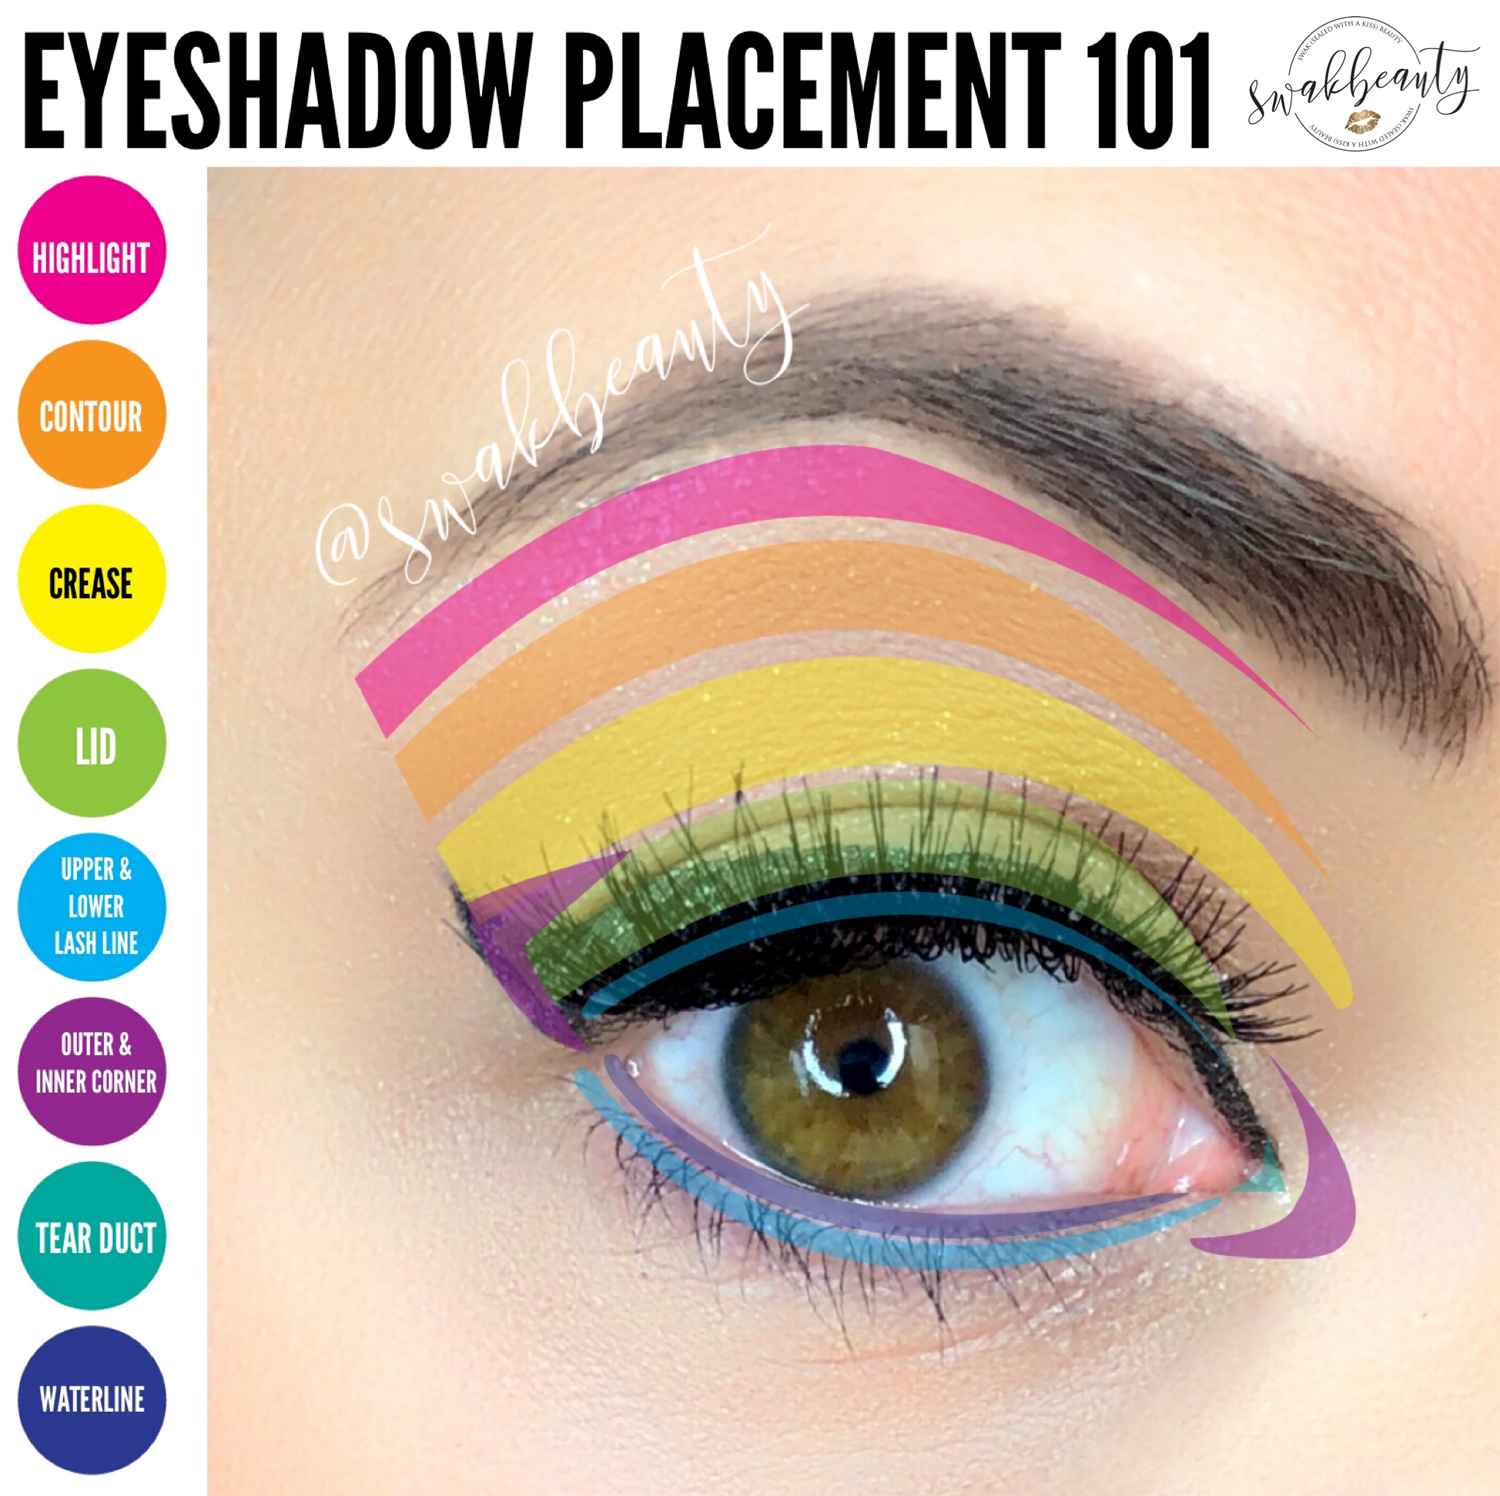
With my daily MOTD looks, I always call out the placement of all the shadows I use, but sometimes there is some confusion about where and what those locations are. So, I created this super helpful graphic to better clarify – for us all! 🙌
NOTE: Some of my previous MOTD look descriptions may not match this chart 100%! I’ve used some variance in the past of what each area is specifically called – yes, I’m still learning, too! But I will be referring to this for ALL future looks – so definitely SAVE THIS for future reference! 📌
These are UNIVERSAL terms so it should help you better understand shadow tutorials from EVERYWHERE – not just me! 😘
And while RuLeS aRe MaDe To bE bRoKeN… here are some extra shadow tips and tricks that I like to stick with!
👁 I LOVE using a Shimmer or Glitter ShadowSense on my highlight and inner corner! It can really liven up a look and add a small touch of glam.
👁 I prefer sticking to Matte ShadowSense colors in my crease – but I don’t always follow this rule, either!
👁 I often times refer to the lid in THREE parts – Inner, Main and Outer, for added dimension and variety in a look
👁 Do NOT be afraid to play with your makeup! Have FUN and keep makeup wipes and Q-tips handy for mistakes. (We ALL make them, at EVERY level!)
👁 Experiment with a variety of brushes as well as your finger tips for application! Find what works best for YOU – this may evolve over time! Keep playing and trying new things!
I hope you all find this helpful! Comment below if you’ve been liking my instructional graphics, and which ones you want to see NEXT! ⬇️⬇️⬇️